


Hanging Lights for Setouts
Use these lights to to make organic winter salads.
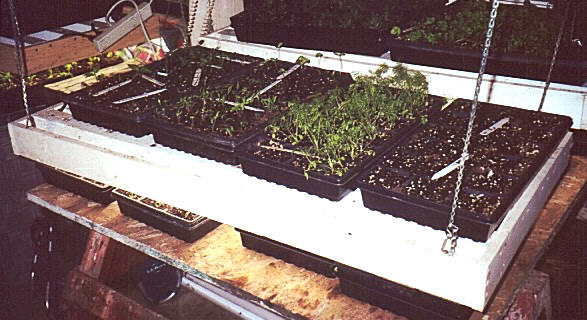
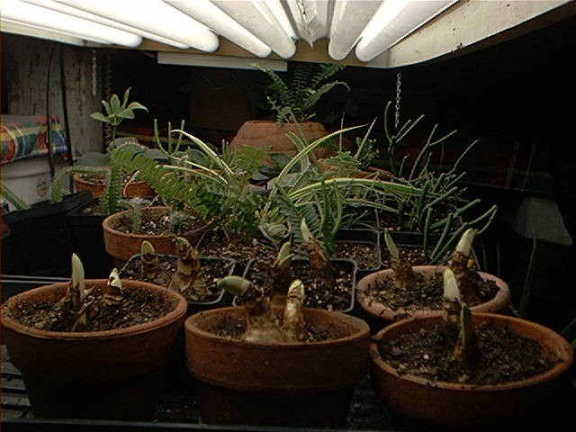 The picture is how things look in the basement by the first of March. The right is picture is some cuttings from Texas and bulbs for a little Spring color. We have seven light assemblies and they can sustain up to 56 trays at a time.
We got this idea from a magazine like Country Journal or Backwoods Home several years ago and have modified it to work for us. The lights cover four standard greenhouse trays (10" x 20") and four more can rest on top. By rotating the trays every twelve hours, each assembly can sustain eight trays. Heat from the ballasts can also be used to speed the germination of seedlings by placing the trays on top.
The florescent bulbs are the cheap shop light variety, not the spendy grow bulbs. They lose about 30% of their output power each season and need replacing yearly. You will definitely notice a lack of plant growth if you try to go two seasons on the bulbs. The fixtures are also the cheap shop light kind and cost about $10 at discount home improvement stores. During sales promotions, they sell for as little as $5. Just be sure to buy four identical fixtures. Total cost is about sixty dollars per assembly or less if you get the fixtures on sale. Here's what you will need:
- 4 each shop light fixtures - all the same - the kind with plug in cords
- 8 each 40-watt cool white bulbs
- 2 each 1" x 4" x 8' boards
- 1 each cheap outlet strip
- 20 foot sash chain (nice) or light weight rope
- 4 each hooks (can be bent from coat hangers)
- Drywall screws 1 1/4"
![]() Lay out the fixtures on a flat surface side by side. Cut the two pieces of wood to the length of the fixtures. These will vary in length from 48" to 51" depending on the style of fixtures. Set the side pieces next to the fixtures and mark the length of the end pieces. Cut the end pieces to length.
Lay out the fixtures on a flat surface side by side. Cut the two pieces of wood to the length of the fixtures. These will vary in length from 48" to 51" depending on the style of fixtures. Set the side pieces next to the fixtures and mark the length of the end pieces. Cut the end pieces to length.
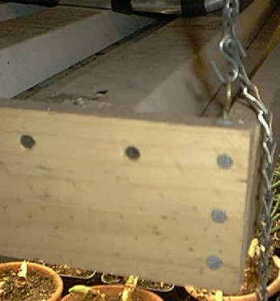
![]() Some fixtures come with short cords so that it may be necessary to take off the end cap of the farthest fixture and make a new opening for it so that all the cords will fit into one outlet strip. While the cap is off, note where the wires and bulb holders are. You will have to miss these when you attach the fixtures to the end pieces. Some of the newer fixtures have cord coming out of the end caps. In that case, drill a hole large enough for the plug to go through like in the picture above.
Some fixtures come with short cords so that it may be necessary to take off the end cap of the farthest fixture and make a new opening for it so that all the cords will fit into one outlet strip. While the cap is off, note where the wires and bulb holders are. You will have to miss these when you attach the fixtures to the end pieces. Some of the newer fixtures have cord coming out of the end caps. In that case, drill a hole large enough for the plug to go through like in the picture above.
 Screw the end pieces to the side pieces using three screws in each joint. Attach each fixture with two screws driven through the end piece into the end cap of the fixture. Use caution here as you don't want to pierce a wire or damage the bulb holders.
Install two bulbs in each fixture and plug it in to make sure it is working properly. Remove the bulbs. Attach the four hooks with screws and paint the wood if desired. Install bulbs and suspend the assembly one to two inches off the trays. I always date the bulbs to make sure I don't try to use them more than one or maybe two seasons.
Place trays that need germinating on top of the warm fixtures. As the seedlings grow, raise the fixture so that the bulbs are about a inch above the leaves. If the setouts become spindlely, your lights are too high or the bulbs too old and have lost their output power. If you have trays of uneven heights, stick a spacer under the shortest tray to bring the plants closer to the lights. Rotate the top and bottom trays every twelve hours or use a timer if you don't have that many trays.
WARNING: Use caution when moving the light assemblies. They are heavy and it is easy to break the bulbs. It works better when two people make the adjustments to the height of the assemblies. Milk and Honey Farm is not responsible any damage or injury caused the by construction or use of the light assembly or of the damage or failure of seedlings and setouts.